Tuesday, 18 March 2014

Star Struck.......


Well, true to their word, the weather men that is, we did have clear skies on Thursday......

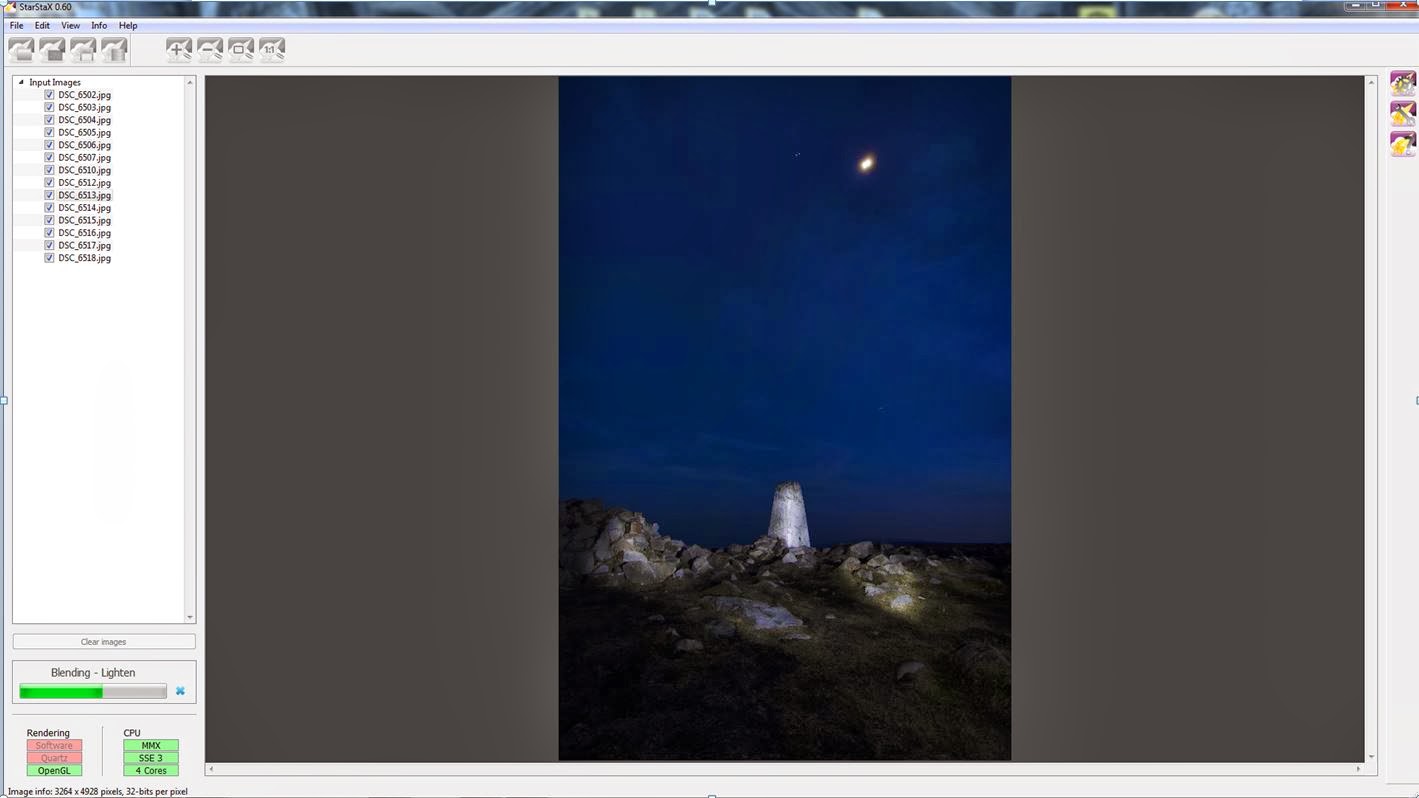
We also had a very bright moon........

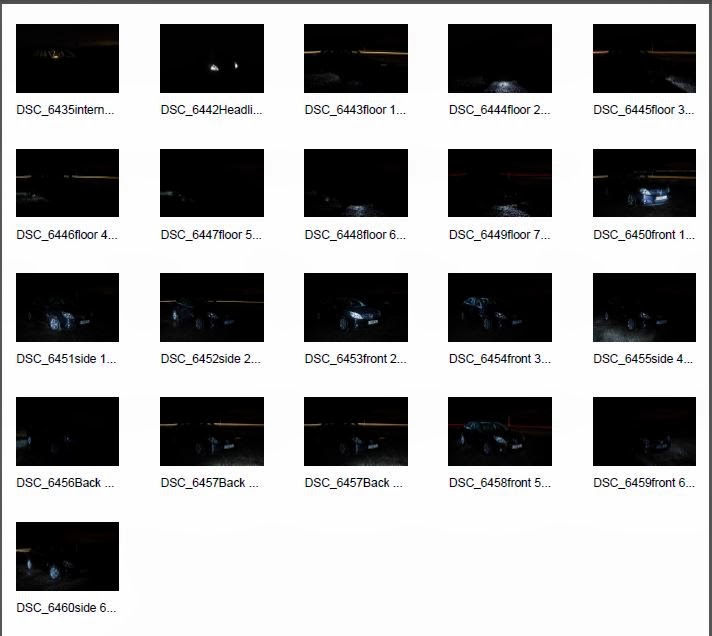
I was determined to at least produce a star trail to get some practice. I have included all the photographs I took in the contact sheet below.

After converting them from raw files to Jpgs, using Photoshop, I ended up with 67 shots that I wanted to use.


Loading these images into Star Stax, I compiled the images into one image.
 

I then produced the following image.


As a first attempt it fulfils my brief of producing a star trail.

There are a number of improvers though that I would like to incorporate to improve my next star trail image.

1.       The foreground is too light; I think that taking the foreground using a different aperture would improve the image. The star trails were caught at maximum aperture f2.8 and a focal length of infinity. I think stepping down to f11 would not only improve the crispness of the foreground. But let in less light, in order for me to light up the foreground with more control using a torch, as the foreground was basically lit using ambient light.

2.       The moon was too bright, allowing the sky to remain rather light at such a large aperture, picking a clear night with little or no moon would improve the image further.

3.       Waiting until a little later at night. Again due to the moon light and dark only just descending there was still too much light in the sky to produce a really dark image.

4.       Line up the camera better so that Polaris was a little more central.

5.       Maybe taking the ISO down a little as well from ISO 500 to 400 or even lower will let a little less light in. The shutter speed I would remain set at 30 seconds.

That said however, the image is quite effective and some individuals actually like the graduated sky. Personally I would have liked it a bit darker.

I guess it’s a waiting game now, I need all the elements to come together to produce an image more akin to what I envisage. No or very little moon and clear skies........

Photography is never easy...........


Thursday, 13 March 2014

Photobook Intensions.


During this course on experimental Photography, I have leaned towards two genres.

1.     Long exposure of water.

2.     Painting with light.

I already use the long exposure technique for some of my landscape photography, so producing a Photobook of long exposure landscape and water, for me, wouldn’t be pushing my photography in another direction.

Having read Eric Curry’s Book “Painting with light” and viewing many of his photographs as encouraged me to delve deeper into this genre.

Eric isn’t the only person who I have researched for this genre however and another two Photographers that produce images that have inspired me are Andrew Whyte for his “light painted” vehicle shots, as well as Michal Iwanowski for his photography project called “Ne”, in which he “light paints” scenes incorporating individuals, whether it be internal or external locations.

The result of a well performed light painted photograph brings out a completely different image from one that is photographed in the day.

The torch light brings out different details in a light painted photograph than the same scene would offer if photographed during the day.

It’s this difference that encourages me to produce a photobook of images shot at night using torch light.

My intension is to produce a professional Photobook of some 20 photographs from different locations, incorporating different objects and light, taking inspiration from the three aforementioned photographers.

It's layout will consist of an image per page, incorporating maybe a double page spread if any of my images allow. This will be assessed nearer the time of completion.

Tuesday, 11 March 2014

A "Light" Trig-er

Having visited the Trig point once, I wanted to visit it again to try and complete the star trails.

Unfortunately, this is Wales and when I got up to the location, you never guess what!!!!!! it clouded over!!!!!!!!

Not to waste the walk and return without and photos, I decided to practice lighting up the trig point again.

This time I changed the vantage point slightly.

The contact sheet below is of the photographs taken to make up the final image.

 
Again, the images were stacked in Star Stax and then manipulated further in Photoshop.
 
Below is the final result..


I like this second version, as there is more lead in to the Trig point with differing depths of light and shade.
 
The rocks are well lit and sharp as is the actual Trig Point.
 
There is also colour in the sky which I think adds colour to the image.
 
I do think however that the image can be improved further by cropping some of the  foreground as there isn't a lot of interest in the immediate foreground.
 
 
Below is the cropped version, which I think is an improved image.
 

The image was taken with my Nikon D7000 and Tokina 11-16mm f2.8, set at ISO 200 and @ f5.6

The good new is that apparently clear skies are due on Wednesday 12th and Thursday 13th March, so I may just complete a Star Trails image yet!!!!!

Watch this Space!!!!!!!


A “light” trek up the Blorenge Mountain


Another fine night, so I decided to walk up to the local Trig point on the Blorenge Mountain for another light painting session.

I would have loved to try and do a star trails image too, but there was too much cloud about, when I reached the Trig Point.

Below is the contact sheet that includes the photographs that I used to make up the final image.


As you can see, I have removed a portion of the sky that did have a little of the star trail in, as this I believe offered nothing to the image.

I combined the images using a program called Star stacks this time, as I wanted to use a different piece of software, partly to broaden my knowledge of different types of software and partly to see what difference using this software would make to an image, compared to my normal Photoshop.

The screen grab below is of the software in progress, assembling the photos into a single image.
 

I then imported the single image into Photoshop for some final adjustments.

Below is the final image.


The idea was to try and get some foreground detail into the image by using my Tokina 11-16mm DX lens, coupled to my Nikon D7000.

I quite like the effect of the grass and stones leading up to the trig point in the centre of the image.

I would have liked to improve the image even further by having a clear night and including circles of stars emanating from the top of the Trig Point.

This is for another day (or night)

The image won’t win any awards, but I believe it shows the effect of light painting quite well.

Had this originally not been an attempt to capture star trails as well as painting the Trig Point and surrounding area with light, I believe moving the camera position higher, so that more of the surrounding landscape could be painted, would have further improved the image.

Monday, 3 March 2014

Making "Light" work of the Garden

Another dry night tonight, so I decided that there was no time like the present.

I went to my parents house to shoot some garden tools propped up against one of my fathers sheds.

I decided to try and illuminate inside the shed as well as the surrounding area.

Below is the contact sheet of the shots I took.

This image is made up of only 6 out of the 7 shots taken.


Step one was to illuminate the inside of the shed so that the detail inside could be seen.


Step two was to shoot the inside of the door as well as the tree.


Step three was of the tree, floor and ladder.


Step four was the Shed Front.


Step five was of the right hand side of the shed.


Step six was to light the roof of the shed.


All these images were then loaded into Photoshop as individual layers and combined into one image.


The final image was then exported as a jpg.


All the photographs used were taken on a Nikon D7000 camera with a Tokina 11-16mm f/2.8 wide angle lens.

Focal length was set at 16mm and f/11

Each photograph was exposed for 30 seconds using a 125 lumens torch.

I am quite happy with the final result. I think that taking what I have learnt from the two car shoots as well as reading Eric Curry's book has enabled me to make progress.

I could improve the image further though. I think the lighting on the front of the shed could be more even, as well as cleaning the window so that more was visible from outside.

The other shed next to the one I was painting could also have been lit, as the door is open and what is inside could have been included in the image.

Better planning would improve this image further.

I will say that I am thoroughly enjoying painting with light though.


Sunday, 2 March 2014

Revisiting the Car shoot.

Having tried to paint my car with light a couple of weeks ago, I decided to give it another go..

I was hoping for a better sky as well and better definition and a better final image.

Below is the Contact sheet of the images taken.

This time I also had the addition of a late night orientierer walking past with a head torch, giving a squiggly line in the background.


Unfortunately I wasn't early enough to get a light sky and it was wet and getting colder, but I want to improve my skills and the only way to do this is practice.

After reading Eric Curry's book, practice will only improve my skills.

Below is the final image.


I am happier with this result as I think the interior is better, along with the bodywork being painted slightly better.

The light trails in the background of the photo are also much better and the addition of the passer by also adds another element to the image.

I think the foreground is better lit as is the road. The underneath of the vehicle is also better lit and there is better definition in the headlights.

Overall I think this image is an improvement on the first attempt.

Practice, Practice, Practice..... I think that's the mantra!!!!!!

A "Light" Read........


In my pursuit to improve my painting with light skills, I decided to purchase the "Painting with Light” book by Eric Curry, who in my opinion is one of the best at this genre of photography.


The book explains and details Lighting and Photoshop techniques for photographers who wish to improve their skills in this area of photography.
Eric included details of the equipment he uses, such as what lighting to use, as well as how he lit certain subjects, he also describes the use of low tech solutions such as painting poles with lights attached to light a scene from above. This enables him to produce an even light over a subject without creating hot spots.
Eric also recommends the use of mains powered lighting for larger projects of a few hours or more, however he also uses standard torches or flash lights such as a small AA Maglite for some scenes. It really depends on the scene and the complexity of the image your trying to produce.
What I like about the book is that he has also described how to recombine the images you take into a single photograph using Photoshop.
This is an important step in the production of the image and one that you need to get right to produce an image that you will be happy with. It’s not a step by step guide however, and some basic knowledge of Photoshop is required, but that is all that is needed.
Other useful information contained in the book is a few of his lighting plans. It seems that Eric has a plan in his head of how he is going to light the scene and that is put down on paper. This again is obviously important, as knowing what you want to get as a final image and producing the final image will depend greatly on how the scene is lit.
Also included in the book is a series of images of various photographs Eric has produced, showing how he has lit various portions or area.
This also enables you to understand what techniques are used to produce the final image.
Again it’s not a step by step guide but a series of illustrations meant to give you the tools you require to go out and try the technique.
All in all I am very pleased with my purchase, and believe that this book will give me a greater understanding of Eric’s painting with light technique, which in turn will hopefully enable me to produce better images.
Would I recommend this book to anyone interested in this genre of photography? Well the short answer is YES……
Packed full of information, pictures and instructions, as well as encouraging words, if your going to dip your toe into the world of light painting, there is no better place to start in my opinion.
A great “light” read……..

Eric Curry (2013). Painting with Light. Buffalo, NY: Amherst Media. p01-p159.